

How to Install Acrylic / Perspex Sheets: A Step-by-Step Guide
Quick Summary: Installing PLEXIGLAS® acrylic / Perspex solid sheets requires careful planning of expansion gaps (6mm per metre), selection of compatible sealants and fixings, and the correct glazing bar or pointwise fastening system. Always remove the protective film last, and never walk directly on installed sheets.
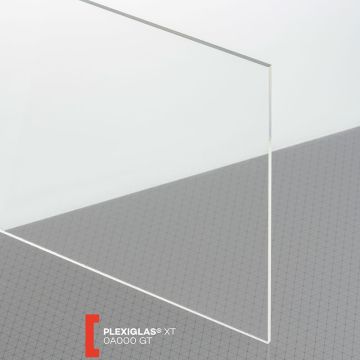
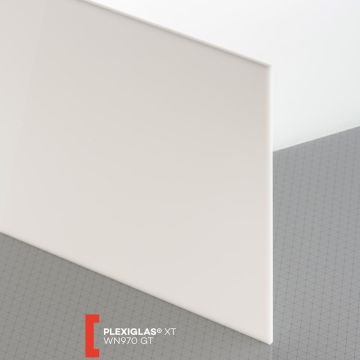
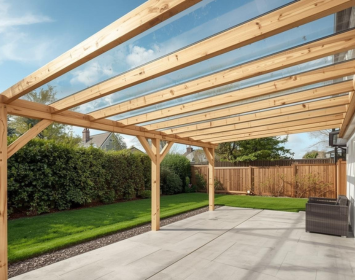
PLEXIGLAS® solid acrylic / Perspex sheets are a versatile, lightweight alternative to glass — used in everything from canopies and balcony screens to partitions, roofing, and DIY glazing projects. They offer exceptional optical clarity, UV resistance, and ease of fabrication. However, getting the installation right is critical. Use incompatible sealants, ignore thermal expansion, or over-tighten fixings and you risk cracking, crazing, or seal failure within months.
This guide walks through every stage of installation — from storage and cutting through to glazing bar systems, canopy fastening, and final finishing — based on manufacturer guidelines for PLEXIGLAS® solid sheets.
Contents
- Tools and Materials Required
- Storing Acrylic Sheets Before Installation
- Compatible Sealants and Auxiliary Materials
- Allowing for Thermal Expansion
- Installing Glazing Bars Step by Step
- Walking Safely on the Roof During Installation
- Canopy Systems: Pointwise Fastening
- Removing the Masking Film
- Common Installation Mistakes to Avoid
- Frequently Asked Questions
Tools and Materials Required
Before starting any installation, gather the correct tools. Using the wrong blades or drill bits is one of the most common causes of chipping, cracking, and edge damage on acrylic sheets.
Cutting Tools
- Jigsaw blade with straight teeth and tooth pitch of 2.5mm
- Circular saw blade with straight (ideally trapezoidal flat) teeth, tooth pitch approx. 13mm
- Contour cutter with stop ring (for curved cuts)
- Medium to fine machine file (for smoothing cut edges)
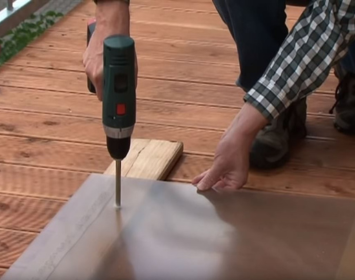
Drilling Tools
- Metal drill ground specifically for acrylic — point angle 60° to 90°
- Step drill or conical drill
- Countersink bit
General / Fixing Tools
- Waterproof marker
- Scraper
- Spray bottle
- Screws with large washers (min. 60mm diameter for canopy applications)
- Rivets (for terminal angle fastening)
- Crawling boards, min. 50cm wide (for roof installations)
- Non-slip blanket (to protect sheets when using crawling boards)
Storing Acrylic Sheets Before Installation
If sheets cannot be installed immediately, correct storage is essential to avoid warping, contamination, and surface damage.
- Store indoors wherever possible, away from direct sunlight and moisture
- PLEXIGLAS® sheets arrive with a protective PE masking film — leave this in place until after installation
- If stored outdoors or on an open pallet, keep the PE film in place to protect against moisture and soiling
- Store flat or upright on a clean, padded surface — never lean sheets at a steep angle unsupported
Compatible Sealants and Auxiliary Materials
PLEXIGLAS® acrylic is sensitive to certain chemicals and materials. Using incompatible sealants or cleaning agents is a leading cause of stress crazing and surface degradation. Always verify compatibility before use.
Warning — Incompatible Materials: Never use plasticised PVC components, paint solvents, degreasing agents, or aggressive corrosive media in contact with PLEXIGLAS® sheets. These will cause surface crazing, cracking, and failure of the sheet over time.
Compatible Seal Materials
- APTK (EPDM rubber) — highly recommended for outdoor glazing seals
- Polychloroprene
- PE (Polyethylene)
- PTFE
- TPE
- Silicone rubber — must be PLEXIGLAS®-compatible grade; verify with supplier
If you are uncertain about the compatibility of a specific glazing system or auxiliary material, contact the 365 Plastics team for guidance before proceeding.
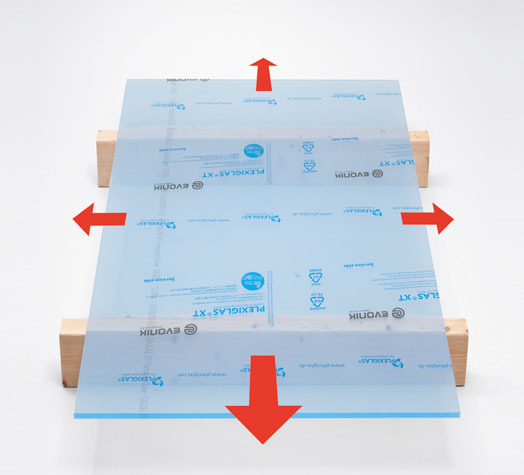
Allowing for Thermal Expansion
This is one of the most critical — and most frequently overlooked — aspects of acrylic sheet installation. PLEXIGLAS® solid sheets expand and contract with changes in temperature and humidity. Fail to account for this and the sheets will buckle, crack, or cause seal failure.
Expansion Allowance Rule
Allow approximately 6mm per metre of sheet length and width for thermal expansion. A 2m x 1.5m sheet therefore requires at least 12mm of clearance on the length and 9mm on the width at all fixed edges.
The required gap between sheet edge and wall can be bridged using suitable wall connecting systems. Always use these rather than forcing the sheet hard against a fixed surface.
For guidance on choosing the right sheet thickness and size for your project, browse the full range of acrylic / Perspex sheets available at 365 Plastics.
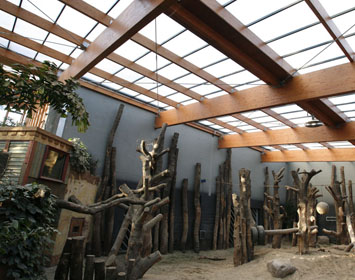
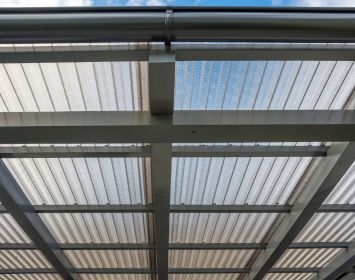
Installing Glazing Bars Step by Step
Linear fastening using glazing bars is the preferred installation method for most PLEXIGLAS® solid sheet applications. It offers better load distribution and allows the use of thinner (lighter, lower-cost) sheets compared to pointwise fixing.
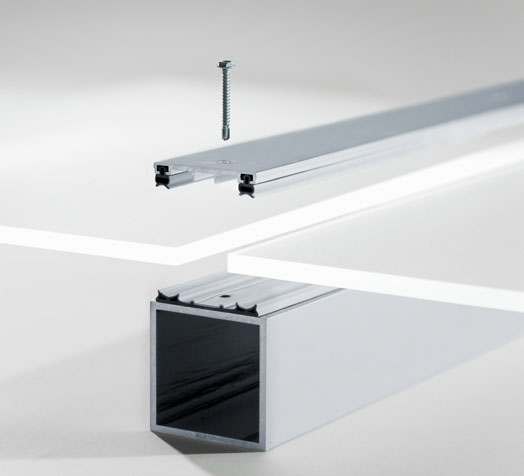
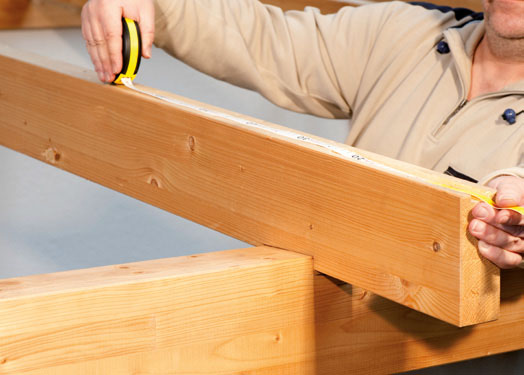
Step 1 — Measure and Prepare the Glazing Bar
The glazing bar must be at least as long as the purlin. The leg length of the Aluminium Terminal Angle is typically added to the length of the purlin or glazing bar. This angle prevents sheet slippage.
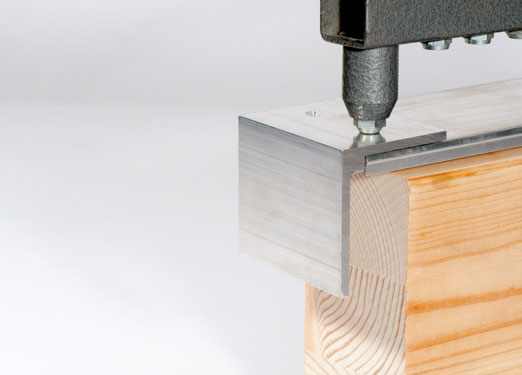
Step 2 — Fasten the Terminal Angle
Secure the Aluminium Terminal Angle to the purlin using rivets or screws before installing the glazing bar. Do not skip this step — the terminal angle is what prevents the sheets from sliding under load or wind uplift.
Step 3 — Fix the Upper Glazing Bar Sections
Fasten the upper sections of the glazing bar profiles to wooden or metal purlins using screws spaced approximately 330mm apart. Use screws with washers to avoid point loading. Use PVC or aluminium edge sections to close off the roof at the sides.

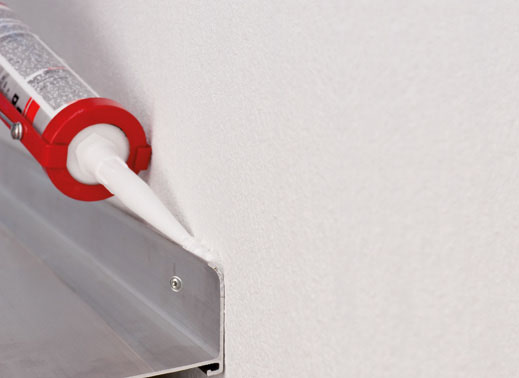
Step 4 — Seal Wall Connecting Systems
Where the roof meets a wall, use appropriate screw-on wall connecting systems. Incise sealing strips at points where they meet glazing bars. Seal the wall junction with permanently flexible, PLEXIGLAS®-compatible rubber or silicone.
Step 5 — Set Contact Pressure Correctly
Contact pressure must allow adequate weather tightness while still allowing sheets to slide in response to thermal expansion. Over-tightening compresses the elastic seal beyond its limit, causing premature failure. When in doubt, err on the side of slightly less pressure rather than more.
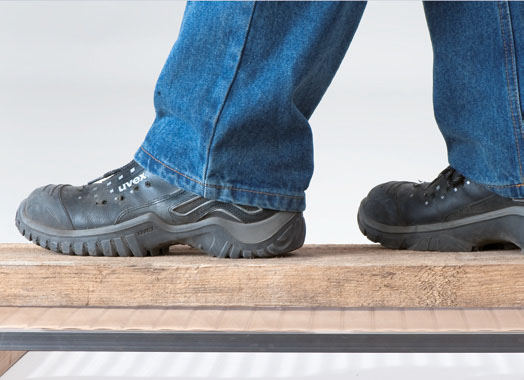
Walking Safely on the Roof During Installation
It is often unavoidable to access the roof surface while positioning sheets or tightening glazing bars. Follow these rules to prevent sheet damage and comply with safety standards.
Never walk directly on PLEXIGLAS® sheets. Always use crawling boards at least 50cm wide, distributed across the purlin structure — never resting load on the sheet unsupported. Place a non-slip blanket between the board and the sheet to prevent surface scratching.
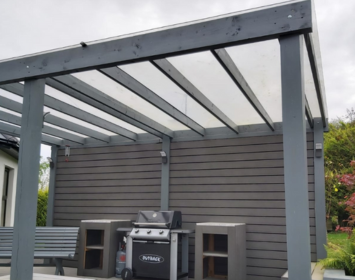
Canopy Systems: Pointwise Fastening
For canopy and entrance canopy applications, pointwise fastening offers a clean, minimal aesthetic — particularly effective when sheet edges are polished. However, this method has stricter technical requirements than linear glazing bar systems.
Pointwise Fastening Requirements
- Minimum sheet thickness: 12mm
- Drill holes must be significantly larger than the screw thread to allow thermal movement
- Fit a polyethylene sleeve inside each drill hole to protect the sheet wall from the metal thread
- Use large washers — minimum 60mm diameter — with compatible elastic seals (e.g. EPDM rubber)
- Tighten screws only until the sheet is held — do not compress; sheets must still be able to move
- Maximum canopy projection: 1,200mm
- Spacing from drill hole to sheet edge: approx. 150mm
- Fixing point spacing: approx. 330mm
- Minimum roof pitch: 5–10° (90–180mm/m)
Tip: Polishing the sheet edges before installation significantly improves the finished appearance of canopy systems and helps prevent edge chipping over time. If you are cutting acrylic sheets to size before installation, allow extra material at the edges for edge-finishing.
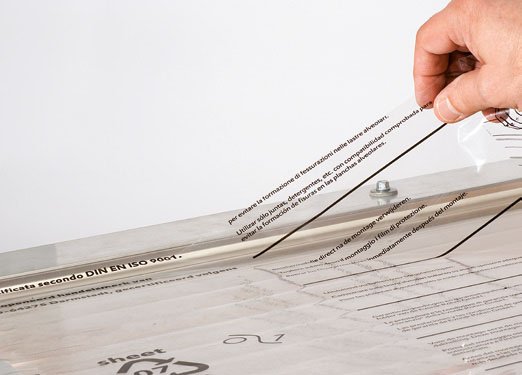
Removing the Masking Film
The protective PE masking film on PLEXIGLAS® sheets should be removed only after all sheets are fully installed and all glazing work is complete. Removing it earlier exposes the surface to scratching during the fitting process and makes it harder to handle sheets cleanly.
Once the film is removed, inspect the surface for any marks or residue. Light adhesive residue from the film can usually be removed with a mild soap solution and soft cloth. For post-installation care, see our guide on cleaning acrylic and polycarbonate sheets.
Common Installation Mistakes to Avoid
- No expansion gap — the most common cause of buckling and cracking; always allow 6mm/m
- Incompatible sealants — plasticised PVC and solvent-based products will cause crazing
- Over-tightening fixings — sheets must be held, not compressed; over-tightening causes stress fractures
- Removing masking film too early — leads to surface scratching that is irreversible
- Wrong drill bit — standard wood or masonry bits crack acrylic; always use a metal drill ground to 60–90° point angle
- Fixing hole too close to edge — minimum 150mm from sheet edge for pointwise canopy fixing
- Walking directly on sheets — always use crawling boards; direct foot traffic will crack or permanently mark the surface
- Under-thickness for canopies — minimum 12mm for pointwise-fastened canopy applications
Related Guides and Products
Cutting Acrylic Sheets
Need to cut your Perspex sheets to size first? Our complete guide covers jigsaws, circular saws, scoring and snapping, and finishing edges.
Read: How to Cut Acrylic / Perspex SheetsCleaning Acrylic Sheets
Once installed, maintain optical clarity with the right cleaning techniques. What to use, what to avoid, and how often.
Read: Cleaning Polycarbonate & Acrylic SheetsShop Acrylic / Perspex Sheets
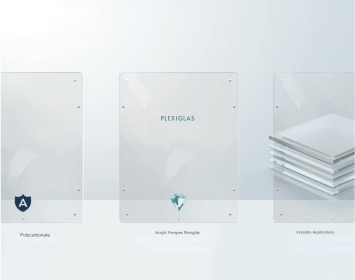
PLEXIGLAS® solid sheets in clear, opal, and mirror finishes — available in 2mm through 20mm thickness, cut to size.
Shop: Acrylic / Perspex SheetsGlazing Bars & Accessories
Rafter glazing bars, terminal angles, edge profiles and compatible fixings for solid sheet installations.
Shop: Glazing BarsFrequently Asked Questions
Q: How much expansion gap do I need for acrylic / Perspex sheets?
A: Allow approximately 6mm per metre of sheet length and width. This applies to all fixed edges and must be provided through the glazing system or wall connecting profiles — never by forcing the sheet tight against a fixed surface.
Q: What drill bit should I use for PLEXIGLAS® acrylic sheets?
A: Use a metal drill ground specifically for acrylic, with a point angle of 60° to 90°. Always drill holes significantly larger than the screw thread to allow for thermal movement, and fit a polyethylene sleeve inside each hole to protect the sheet wall from direct metal contact.
Q: What sealants are compatible with PLEXIGLAS® acrylic sheets?
A: Compatible materials include APTK (EPDM), Polychloroprene, PE, PTFE, TPE, and silicone rubber (PLEXIGLAS®-compatible grade). Avoid plasticised PVC, paint solvents, and degreasing agents entirely — these cause crazing and structural weakening.
Q: Can I walk on a PLEXIGLAS® acrylic roof?
A: Only using crawling boards at least 50cm wide, positioned across purlins rather than resting on the sheet alone. Place a non-slip blanket between the board and the sheet. Never walk directly on acrylic sheets.
Q: When should I remove the protective masking film?
A: Only after all sheets are fully installed and glazing work is complete. Removing the film earlier exposes the surface to scratching during fitting and makes the sheets harder to handle cleanly.
Q: What thickness of acrylic do I need for a canopy?
A: A minimum of 12mm for pointwise-fastened canopy systems. Maximum projection is 1,200mm with fixing points at 330mm centres and a minimum roof pitch of 5–10°. For larger spans, consult the 365 Plastics technical team. Browse acrylic sheet thickness options online.
Q: Is linear or pointwise fastening better for acrylic sheet installation?
A: Linear fastening using glazing bars is generally preferred as it provides better load distribution and allows the use of thinner sheets. Pointwise (canopy) fastening offers a cleaner aesthetic but requires thicker sheets (min. 12mm), precise hole sizing, and careful control of fixing torque.
Ready to Start Your Project?
Whether you are glazing a canopy, fitting a balcony screen, or installing a lean-to roof, getting the installation right from the start ensures years of trouble-free performance from your acrylic sheets.
Browse the full range of PLEXIGLAS® acrylic / Perspex sheets and glazing bars and installation accessories online at 365 Plastics.
Not sure which sheet thickness or fixing system is right for your project? Contact the 365 Plastics team — we're happy to advise.
About This Guide: Installation guidance based on PLEXIGLAS® manufacturer recommendations for solid acrylic sheet systems. Specific project requirements — including structural load calculations, wind uplift, and building regulation compliance — should be confirmed with a qualified professional. For custom sizes, thickness advice, or technical queries, contact the 365 Plastics team directly.