

How to Build a Plexiglas Balcony Screen: Wind & Privacy Barrier Guide
Quick Summary: A Plexiglas balcony screen (made from acrylic / Perspex sheet) delivers outstanding wind protection, full transparency, and long-lasting durability — all at a fraction of the cost of glass. Follow our 7-step video guide below to fit your own screen this weekend.
If your balcony is exposed to wind, noise, or overlooking neighbours, a clear acrylic screen is one of the most practical upgrades you can make. PLEXIGLAS® sheets — the original branded acrylic — can be cut to any size, drilled, and clamped directly onto standard balcony railings without specialist tools. This guide explains the key benefits, walks through the full installation process step by step (with an embedded how-to video), and covers material selection, sizing, and maintenance for your finished screen.
Contents
Benefits of a Plexiglas Balcony Screen
Plexiglas (the branded name for acrylic sheet, also sold as Perspex) is one of the best materials for a DIY balcony screen. Here is why homeowners and apartment dwellers choose it over alternatives like frosted glass, timber boarding, or polycarbonate:
???? Wind Protection
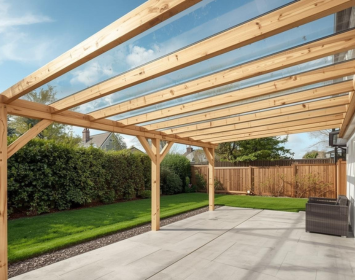
Plexiglas is highly effective at deflecting wind, creating a calm, sheltered zone on exposed balconies — particularly valuable in coastal or high-rise settings.
???? Full Transparency
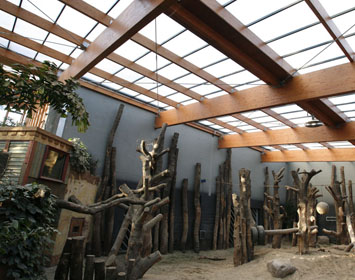
Unlike solid timber or opaque panels, clear acrylic preserves your view completely. Natural light continues to flow through, keeping the balcony bright and open.
???? Noise Reduction
A solid acrylic panel acts as a partial acoustic barrier, reducing traffic noise and ambient sound from surrounding areas — ideal for urban balconies.
???? Shatter-Resistant Safety
Acrylic sheet is far less likely to shatter than glass on impact, making it safer around children and in public balcony settings. It does not produce dangerous shards.
⚙ Easy to Customise
Sheets can be ordered in custom sizes, or cut to measure on-site with standard tools. Tinted, opal, or frosted variants add privacy without losing the sleek look.
???? Cost-Effective vs Glass
Acrylic sheet is significantly cheaper than toughened or tempered glass of the same size, while delivering comparable transparency and superior impact resistance.
☀ UV Stability & Durability
Quality PLEXIGLAS® sheet is UV-stabilised, resisting yellowing and degradation in outdoor conditions for 30 years with minimal maintenance.
???? Easy to Clean
Mild soap and water is all that is needed to keep a Plexiglas screen looking crystal clear. No specialist products required.
Choosing the Right Acrylic Sheet for a Balcony Screen
The sheet you choose will affect wind performance, ease of installation, and long-term appearance. Use the guide below to pick the best option for your balcony:
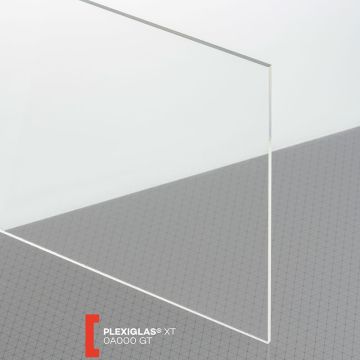
4mm Clear Acrylic
The most popular choice for balcony screens. Rigid enough to resist moderate wind loads, light enough to handle and drill easily. Full clarity.
Best for: Standard residential balconies, apartments
6mm Clear Acrylic
Stiffer and more substantial — recommended for exposed locations, large panels, or where high wind loads are likely. Excellent long-term rigidity.
Best for: Coastal, high-rise, or exposed balconies
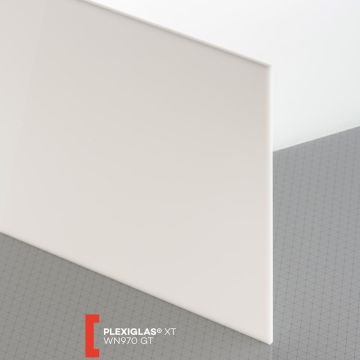
Frosted / Opal Acrylic
Provides privacy from neighbouring balconies while still transmitting light. Diffuses direct view without blocking brightness. Available in 3mm and 4mm.
Best for: Privacy screens, overlooked balconies
Tip — Order Cut to Size: You can order acrylic sheets cut to your exact balcony dimensions from 365plastics.ie, avoiding the need to cut on-site. Measure your railing height and bay width, add 20–30mm clearance on each side for the screw clamp fixings, and place your order. Sheets arrive protected with a film that stays on until installation is complete.
Tools & Materials You'll Need
Materials
- PLEXIGLAS® / acrylic sheet (4mm or 6mm, cut to size)
- Stainless steel screw clamps (suitable for railing diameter)
- Stainless steel screws and washers (nylon-backed)
- Rust-protection spray or zinc primer
- Rubber or nylon spacer washers (to protect the acrylic)
Tools
- Cordless drill with HSS metal drill bit (for railings)
- Sharp twist bit sized 1–2mm larger than screw (for acrylic)
- Marker pen and ruler / tape measure
- Masking tape (to protect sheet surface while marking)
- Screwdriver or socket set
Video: Step-by-Step Balcony Screen Build Guide
The video below from PLEXIGLAS® walks through the complete process of fitting a clear acrylic privacy and wind screen to standard balcony railings — from cutting the sheet to final fixing. Watch it through once before starting, then follow the written steps below as your on-site reference.
Official PLEXIGLAS® installation video — balcony privacy and wind screen
7 Steps to Fit Your Plexiglas Balcony Screen
Follow these steps in order. Leave the protective film on the acrylic throughout — only peel it off once all drilling and fixing is complete.
Cut the PLEXIGLAS® Sheets to Size
Measure your balcony section carefully — width between uprights and height from the bottom rail to where you want coverage. If cutting on-site, score the sheet repeatedly along a straight edge with a sharp cutter (for sheets up to 4mm), then snap cleanly. For 6mm+ sheets, use a fine-toothed jigsaw blade. Alternatively, order sheets ready-cut to size from our online shop and skip this step entirely.
Drill Holes in the Balcony Railings
Mark the drilling positions on each railing upright where the screw clamps will sit. Use a centre punch to prevent bit wander, then drill through with an HSS metal bit at moderate speed. Keep the drill perpendicular to the railing surface. Use masking tape around the drill point to minimise paint chipping.
Apply Rust Protection to the Drill Holes
Exposed bare metal inside the drill holes will begin to rust almost immediately in outdoor conditions. Apply rust-protection spray or a small amount of zinc primer directly into each hole and to the cut edges. Allow to dry fully before fitting the clamps. This step is especially important in coastal or wet climates — skipping it will result in rust streaks on your acrylic within a season.
Fix the PLEXIGLAS® Sheets Using Screw Clamps (Temporary)
Hold the acrylic sheet in its intended position against the railings and secure loosely using the screw clamps. Do not tighten fully yet — this is a positioning step to help you mark the final fixation points accurately in step 5. Have a helper hold the sheet while you clamp if working with a large panel.
Draw Fixation Marks on the PLEXIGLAS® Sheet
With the sheet held in position, mark through the clamp holes onto the protective film using a marker pen. These marks become your drill guides. Place fixation points at least 25mm from any edge of the sheet — drilling too close to the edge risks cracking the acrylic under wind loading over time.
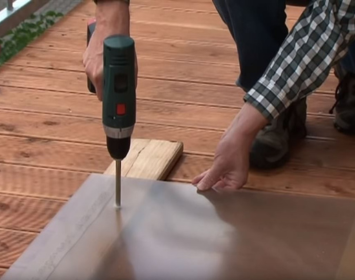
Drill Fastening Holes in the PLEXIGLAS® Sheet
Remove the sheet and drill at each marked point. Use a sharp twist bit sized 1–2mm larger than your screw diameter — acrylic expands and contracts with temperature changes, and tight-fitting holes will cause the sheet to crack at the fixings. Drill at low speed with steady, even pressure. If the bit grabs, place a piece of masking tape over the mark first.
Important: Never use a standard high-speed wood or masonry bit on acrylic at full RPM — it will melt or crack the sheet. Slow drill speed is essential.
Screw the Privacy Screen onto the Balcony Railings
Reposition the sheet against the railings and fit each screw with a nylon or rubber-backed washer on both sides of the acrylic. Tighten firmly but not excessively — over-tightening crushes the acrylic at the fixings and causes stress cracking. The washer protects the sheet surface and accommodates minor movement. Once all screws are fitted, peel the protective film from both faces and enjoy your finished screen.
Pro Tips & Common Mistakes to Avoid
✓ Do This
- Leave the protective film on until all drilling is done
- Use oversized holes to allow for thermal expansion
- Use nylon or rubber washers at every fixing point
- Treat railing drill holes with rust-protection primer
- Use stainless steel fixings — standard zinc screws rust outdoors
- Keep fixings at least 25mm from sheet edges
✗ Avoid This
- Over-tightening screws — it cracks acrylic at fixings
- Drilling at high speed — melts the sheet edge
- Tight-fitting holes — thermal movement will cause cracking
- Drilling too close to the sheet edge
- Using solvent-based cleaners on the finished screen
- Skipping rust protection on metal railings
Cleaning & Maintenance
A Plexiglas balcony screen is low maintenance, but a little care goes a long way to maintaining its clarity over time.
- Rinse first: Use clean water to remove loose dirt and grit before wiping. Rubbing dry dirt against the surface causes fine scratches.
- Clean with mild soap: A dilute solution of warm water and mild washing-up liquid, applied with a soft microfibre cloth or sponge, is all that is needed.
- Rinse and dry: Rinse off all soap residue and dry with a clean soft cloth to prevent water spots.
- Never use: Ammonia-based cleaners (window sprays), solvents, abrasive cloths, or squeegees — all will damage the surface.
- Frequency: A quick clean every 4–6 weeks is sufficient for most outdoor screens. After storms or heavy rain, a rinse-down is recommended.
Frequently Asked Questions
Q: What thickness of acrylic should I use for a balcony wind screen?
A: 4mm is the standard choice for most residential balconies. For larger panels (wider than 1.2m) or highly exposed locations, 6mm provides greater stiffness and wind resistance. We stock both in standard and cut-to-size options at 365plastics.ie.
Q: Can I get acrylic sheets already cut to size?
A: Yes. Simply measure your balcony, add 20–30mm on each side for your fixing clamps, and order cut-to-size sheets online. This eliminates on-site cutting and ensures clean, accurate edges.
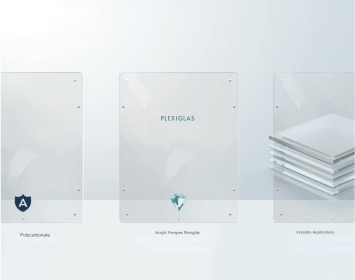
Q: Is acrylic / Plexiglas the same as polycarbonate?
A: No — they are different materials. Acrylic (PLEXIGLAS®, Perspex) offers superior optical clarity and better UV stability. Polycarbonate sheet is tougher and more impact-resistant, but has a slightly lower clarity and can be more prone to surface scratching. For balcony screens where appearance is a priority, acrylic is typically the preferred choice.
Q: Will my Plexiglas screen yellow over time outdoors?
A: Quality PLEXIGLAS® sheet is UV-stabilised, meaning it is highly resistant to yellowing and weathering in outdoor conditions. Cheaper unbranded acrylics may yellow more quickly. With normal cleaning maintenance, a good quality sheet should remain clear for 30 years.
Q: Do I need planning permission for a balcony screen in Ireland?
A: In most cases, fitting a removable screen to an existing railing does not require planning permission in Ireland, provided you are not altering the structure of the balcony. However, if you are in an apartment complex or protected structure, always check with your management company or local authority before proceeding.
Q: Can I use a frosted or tinted sheet for more privacy?
A: Absolutely. Opal or frosted acrylic sheet diffuses the view from outside while still transmitting good levels of natural light. It installs in exactly the same way as clear sheet and is an excellent option for overlooked balconies or ground-floor terraces.
Ready to Build Your Balcony Screen?
We stock PLEXIGLAS® acrylic sheets in a full range of thicknesses and sizes, available for nationwide delivery across Ireland. Order standard sheet sizes or request a custom cut to your exact balcony dimensions.
Browse our range: Acrylic / Perspex Sheets — 365plastics.ie
About This Guide: This installation guide is based on the official PLEXIGLAS® balcony screen method and general best practices for working with acrylic sheet outdoors. Always follow the specific recommendations of your fixing hardware manufacturer, and consult a professional installer for large or structural balcony modifications. For apartments and managed properties, check with your building management company before drilling into shared railings.