


PVC Cladding Installation Guide: Step-by-Step for Walls & Ceilings
Professional Installation for Hygienic PVC Wall & Ceiling Cladding
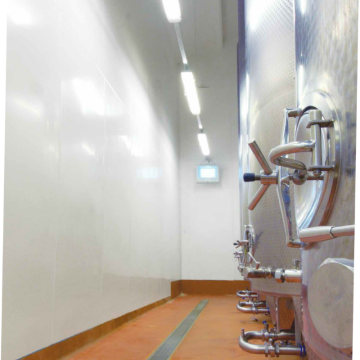
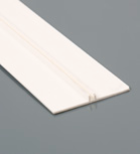
This guide covers everything you need to install Trovidur® EC-Clad PVC wall cladding to a professional standard. PVC cladding is lightweight, durable, and ideal for bathrooms, kitchens, changing rooms, and commercial spaces. Not sure if PVC cladding is right for your project? See our PVC cladding benefits and applications guide.
Quick Navigation
Accessories & Profiles
Successful PVC cladding installation requires the correct profiles and accessories. These components ensure watertight seals, neat finishes, and proper thermal expansion management. Browse our full hygienic cladding accessories range.
Available Profiles
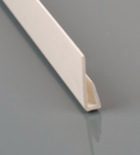
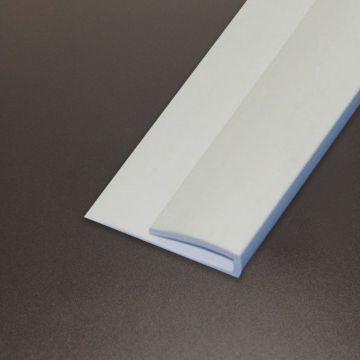
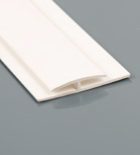
J-Section Capping StripFrames top and bottom sheet edges; provides clean finish and watertight seal |
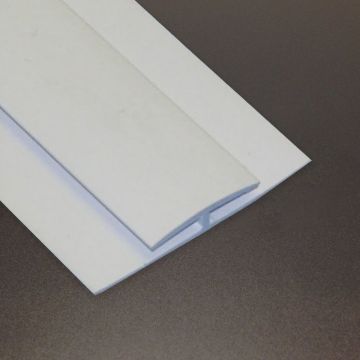
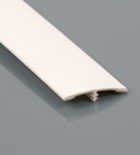
H-Section Division BarJoins two sheets vertically; available in one-part or two-part configuration |
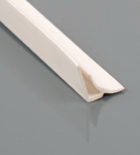
C-Profile Inside CornerNeatly finishes internal corners (90°); maintains continuity of cladding |
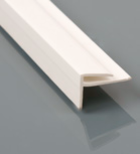
F-Section External CornerCovers external corners (90°); provides protection and neat finish |
H-Section Division CapTwo-part system top component; clicks into place over base |
H-Section Division BaseTwo-part system base component; screwed to wall behind sheet |
Site Preparation
Proper preparation is essential to achieve a professional installation with a consistent appearance. Spending time on this step will prevent problems later.
Pre-Installation Checklist
- ✓ Ensure walls are smooth, level, dry, clean, and completely free from dust
- ✓ All power points, electrical switches, and plumbing pipework must be finished before cladding installation
- ✓ Measure and plan exactly where the cladding will be positioned
- ✓ Never install cladding near hot areas (boilers, heating sources) that could distort sheets
- ✓ Use sheets from the same production batch and in the same orientation for visual consistency
- ✓ Acclimatize sheets for 24 hours at room temperature before installation
Wall Preparation Steps
- Clean: Remove all dirt, dust, and debris from walls using a damp cloth and allow to dry completely
- Level: Check for significant deviations; use filler for large holes or uneven areas
- Prime: If walls are sandy or porous, apply primer to improve adhesive bonding
- Mark Layout: Use a spirit level to mark a vertical line for the first sheet; mark horizontal lines for J-Section placement
- Temperature Control: Ensure room is at least 15°C and acclimatize sheets for at least 24 hours
Step-by-Step Installation
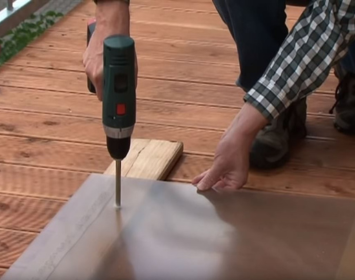
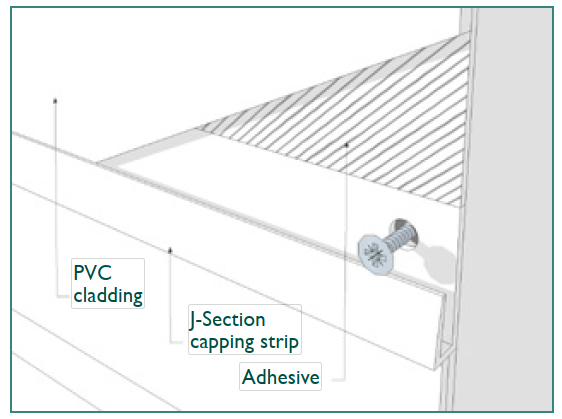
Step 1: Screw J-Sections to Wall
The J-Sections form the frames that hold your sheets in place at the top and bottom edges.
What You'll Need:
- J-Section capping strips (for top and bottom)
- Silicone sealant (bead-applied)
- Suitable screws (check manufacturer recommendations)
- Level tool
Installation Process:
- Mark the horizontal positions for both J-Sections with a level
- Apply a continuous bead of silicone to the wall along the marked lines
- Position the J-Section over the silicone bead and screw securely to the wall, spacing screws at regular intervals (typically 300–400mm)
- Ensure J-Sections are perfectly level and secure
- Check that the gap between sections accommodates your sheet thickness plus 2–3mm for expansion
Proper J-Section positioning with silicone bead
Step 2: Install First Sheet
Installing the first sheet sets the foundation for all subsequent sheets. This step requires accuracy.
- Apply a continuous zigzag pattern of adhesive to the back of the first sheet
- Apply a bead of silicone sealant inside both J-Sections to ensure watertight seal
- Position the sheet at the bottom J-Section
- Drop the sheet into the bottom J-Section and flex it into the top J-Section
- Leave 2–3mm clearance inside the profiles for thermal expansion
- Press firmly along the entire sheet to ensure full adhesive contact
- Wipe away excess silicone immediately with a damp cloth

Sheet positioned in J-Sections with expansion clearance
Step 3: Install H-Sections (Sheet Dividers)
H-Sections join adjacent sheets vertically and provide a clean, professional finish.
For One-Part H-Section:
- Apply a continuous bead of silicone to the inside of the H-Section profile
- Slide the H-Section onto the vertical edge of the first sheet
- Leave 2–3mm expansion gap between the sheet edge and the centre of the profile
- Screw the H-Section firmly to the wall (spacing screws 300–400mm apart)
- Ensure the profile is perfectly vertical
For Two-Part H-Section:
- Apply a continuous bead of silicone to the inside of the base profile
- Slide the H-Section base behind the sheet edge
- Leave 2–3mm expansion gap between the sheet edge and the central fin of the base
- Screw the base securely to the wall (spacing screws 300–400mm apart)
- Once all sheets are in position, press the H-section top caps in place to click onto the base
Step 4: Install Subsequent Sheets
- Apply adhesive zigzag pattern to the back of the sheet
- Apply silicone bead inside top and bottom J-Sections
- Drop the sheet into the bottom J-Section
- Flex the sheet into the top J-Section
- Slide the sheet sideways into the H-Section (start at the bottom and work upward at a slight angle)
- Press firmly for full adhesive contact
- Leave 2–3mm expansion gaps throughout
- Wipe away excess silicone immediately

Sequential sheet installation with consistent spacing
Finishing Corners
Inside Corners (C-Profiles)
- Position the C-Profile inside corner at the junction where walls meet
- Apply a continuous bead of silicone to the inside of the profile
- Screw the profile firmly to the wall
- Slide sheets into the profile from both sides
- Leave 2–3mm expansion gaps in the profile
- Wipe away excess silicone with a damp cloth
External Corners (F-Profiles)
- Position the F-Profile external corner at the junction where walls meet
- Apply a continuous bead of silicone to the inside of the profile
- Screw the profile firmly to the wall
- Slide sheets into the profile from both sides
- Leave 2–3mm expansion gaps in the profile
- Ensure sheets meet neatly in the profile without gaps or overlaps

Properly finished internal and external corners
Cutting & Finishing Sheets
- Best Tool: Sharp craft knife for straight cuts or a jigsaw with a fine-tooth blade
- Temperature: Sheets at room temperature are easier to cut than cold sheets
- Support: Always support sheets properly to avoid chipping or cracking
- Safety: Wear safety glasses; keep hands away from blade path
Recommended Circular Saw Settings
| Parameter | Specification | Notes |
|---|---|---|
| Blade Type | 40/60 Diamond Grit Blade | Provides clean cuts without chipping |
| Clearance Angle | 10° – 15° | Prevents excessive friction and heat |
| Rake Angle | 0° – 6° | Shallow angle for smooth cuts |
| Cutting Speed | 1800 – 2400 m/min | Adjust based on material thickness |
| Feed Speed | 19 – 25 m/min | Smooth, consistent feed pressure |
Cutting Openings for Fixtures
- Mark opening location carefully on the sheet before installation
- Use a drill and jigsaw for curved or irregular cuts (e.g., pipe penetrations)
- For rectangular openings, use a craft knife for straight edges
- Deburr all cut edges with a countersink tool or sandpaper to prevent sharp edges
- Seal cut edges with silicone if they will be exposed to moisture
Adhesive Selection & Application
Polyurethane (PU) adhesive is the recommended choice for PVC cladding installation. We stock industrial strength adhesive suitable for bonding cladding panels to most substrates.
- One 300ml cartridge is typically sufficient per 2400 x 1200mm sheet
- Apply in a continuous zigzag pattern across the entire back surface
- Install sheet immediately (follow adhesive manufacturer's open time)
- Press sheet firmly for full contact with wall surface
- Wipe away squeeze-out within 15 minutes using a damp cloth
Cleaning & Maintenance
Cleaning Agents
- Warm soapy water: Best choice for daily cleaning
- Anti-static cleaner: Recommended for high-traffic areas
- Avoid: Abrasive cleaners, strong solvents, squeegees
Stain Removal
| Stain Type | Recommended Treatment |
|---|---|
| General Dirt | Warm soapy water with soft cloth |
| Grease / Oil | Warm water with detergent; wipe thoroughly and rinse |
| Mould / Mildew | Dilute bleach solution (1:10 with water); rinse thoroughly |
| Paint Splashes | Ethyl alcohol or white kerosene (sparingly); test in inconspicuous area first |
| Adhesive Residue | Remove immediately while wet; hardened adhesive requires careful mechanical removal |
Temperature Range & Specifications
- Service Temperature: -20°C to +60°C
- Non-Toxic: Safe for food contact applications
- Non-Absorbent: Completely impervious to moisture, bacteria, and mould
- Durability: With proper care, installations can last 15–20+ years
PVC expands and contracts with temperature changes — this is why expansion gaps of 2–3mm are critical at all profile junctions. They allow natural movement without buckling, stress on adhesive joints, or visible gaps when the material contracts.
Common Applications
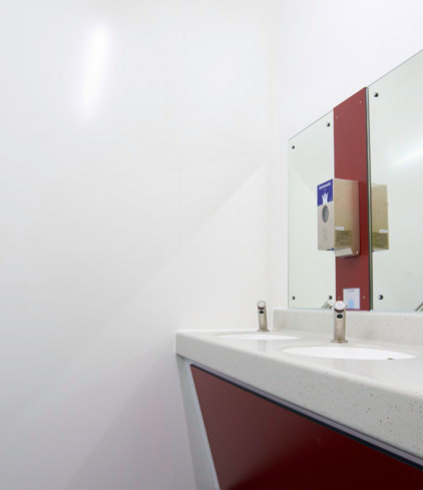
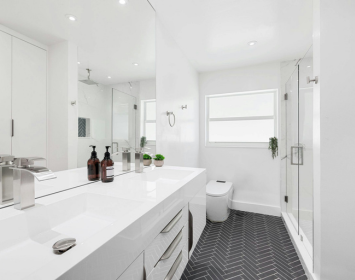
Bathrooms & Shower RoomsPVC cladding for bathrooms — waterproof, grout-free, no pvc cladding bathroom mould problems |
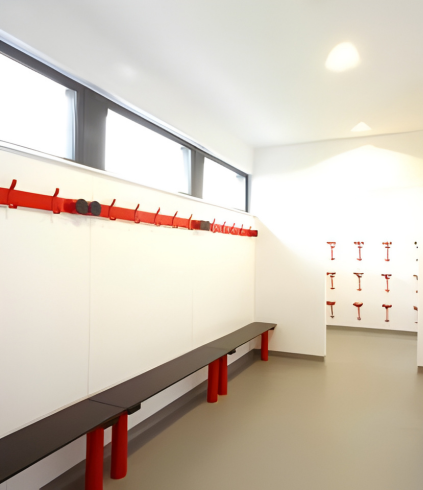
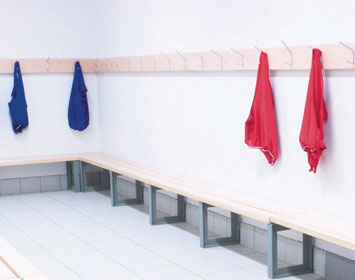
Changing Rooms & LockersDurable, easy-to-clean surfaces for high-traffic environments |
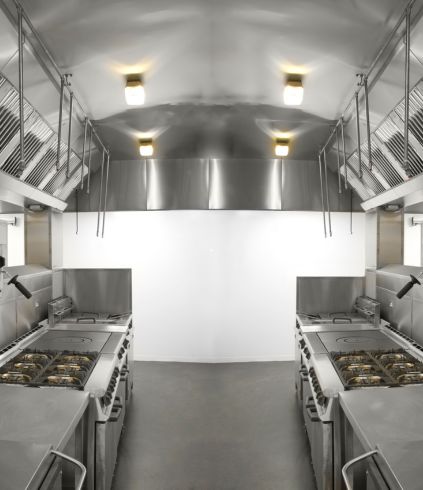
Commercial KitchensFood-safe, non-toxic, easily sanitised hygienic wall cladding |
Animal HousingHygienic, impervious to moisture and urine; easy pressure washing |
Ready to Order?
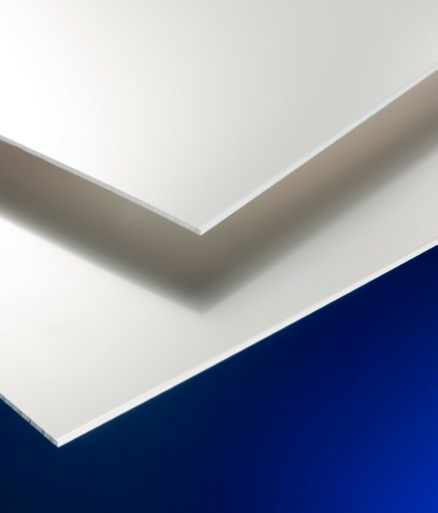
We stock Trovidur® EC-Clad white PVC cladding sheets in 2440mm x 1220mm and 3050mm x 1220mm, with all profiles and accessories for a complete installation. Nationwide delivery across Ireland — PVC cladding Ireland stock available for next-day dispatch.
Not sure how many sheets to order? See our PVC wall panels planning and measuring guide.
View PVC Cladding SheetsDownload the official Trovidur® EC-Clad installation guide PDF for full technical specifications: Trovidur EC-Clad Installation Guide (PDF)