


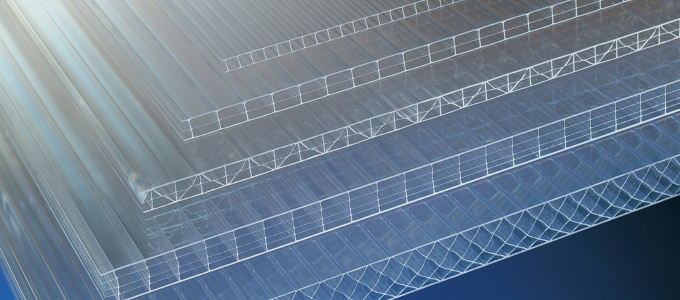
How to Install Multiwall Polycarbonate Roofing Sheets
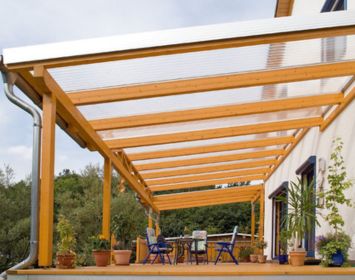
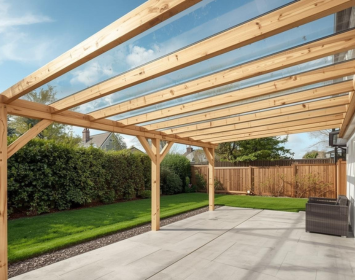
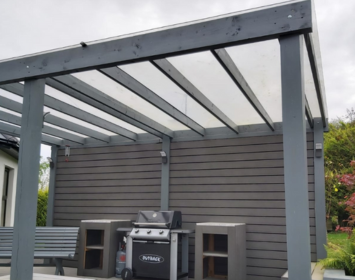
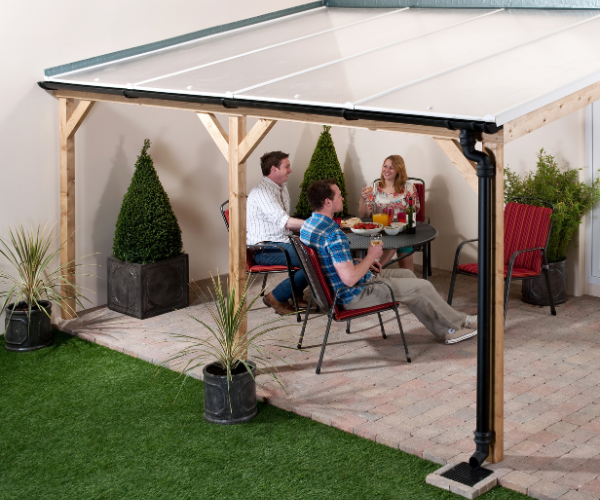
This guide covers everything you need to install multiwall polycarbonate roofing sheets correctly — from rafter spacing and sheet orientation to sealing, flashing, and thermal expansion. Whether you are roofing a pergola, lean-to, carport, or greenhouse, follow these steps for a weathertight result that lasts 15–20 years.
Quick Summary: Multiwall Polycarbonate Installation
Basic steps:
- Prepare glazing bars — install seals, pre-drill at 400mm centres
- Set rafter spacing — 450–1250mm depending on sheet thickness (6mm–25mm)
- Allow 10mm gaps — between sheets for thermal expansion
- Install sheets — flutes running vertically (top-to-bottom slope), UV side out
- Seal edges — breather tape (bottom), sealing tape (top), neutral silicone
- Add end caps — install profiles, trim to size, remove protective film
Project time: 1–2 days for a typical pergola or lean-to | Difficulty: moderate–advanced
Table of Contents
Critical Installation Mistakes to Avoid
These mistakes can reduce your roof’s lifespan from 15–20 years to just 2–3 years:
- Wrong UV side facing inward: this causes rapid material degradation. The UV side (with manufacturer’s writing) must face outward.
- Flutes running side to side: this prevents water drainage and causes pooling, condensation, and algae growth inside sheets.
- Using the wrong silicone sealant: acrylic or non-neutral silicone will attack polycarbonate and cause crazing. Use low-modulus neutral cure only.
- No thermal expansion gaps: a too-tight fit will cause cracking as the material expands and contracts with temperature changes.
- Removing protective film too early: this exposes sheets to scratches and damage during construction.
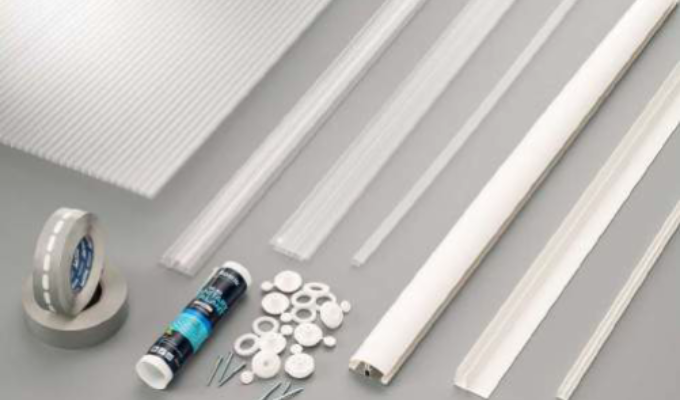
Materials & Tools Checklist
Materials required
- Multiwall polycarbonate sheets (your calculated size)
- Joining profiles (Capex bars or H-section)
- End caps and side profiles
- Fixing buttons (every 400mm)
- Sealing tape (for top edges)
- Perforated breather tape (for bottom edges)
- Roofing screws
- Low-modulus neutral cure silicone
- Butyl flashing (if required)
- Lead flashing (where roof meets house)
Tools required
- Measuring tape
- Jigsaw or circular saw
- Drill with bits
- Screw gun
- Marker
- Safety goggles
- Work gloves
- Caulking gun (for silicone)
- Ladder or scaffolding
What Sheet Thickness Do You Need?
For light structures
6–10mm multiwall
- Pergolas and patios
- Gazebos
- Lean-tos
- Carport covers (light duty)
Rafter spacing: 450–700mm
For heavy-duty structures
16–25mm multiwall
- Greenhouses
- Conservatories
- High snow load areas
- Enclosed structures
Rafter spacing: 1050–1250mm
Taking Accurate Measurements
1. Initial measurements
Start by obtaining initial measurements for your roofing project. Consider the width, length, and desired thickness of the multiwall polycarbonate sheets. These measurements will serve as the foundation for calculating your material needs. Use a measuring tape and measure multiple points to account for any variations.
2. Determining sheet sizes
When working with multiwall polycarbonate sheets, accurate sizing is crucial:
- Width and length: clearly define the width and length of your roof. Confirm dimensions by standing in front of the structure and clarifying with your supplier.
- Joining on rafters: sheets must join on rafters. Measure the distance between outer rafters. For the first and last sheets, deduct 5mm from the measured distance. For intermediate sheets, deduct 10mm.
- Sheet thickness consideration: for canopies and lean-tos, 6–10mm may suffice. For greenhouses and conservatories, 16–25mm with higher U-values is recommended.
3. Calculating material needs
Create a comprehensive checklist of all materials required:
- Multiwall sheets (your calculated sizes and thickness)
- Joining profiles (Capex bars or H-section)
- End caps and side profiles
- Fixing buttons (every 400mm along intermediate rafters)
- Sealing and ventilation tapes
- Roofing screws (appropriate for wood or steel)
- Neutral silicone sealant
- Lead flashing (if roof meets house)
Glazing Bar Preparation
Step 1: Install seals
Lubricate seals and insert them on glazing bars. Avoid stretching to ensure a proper fit. Pre-drill glazing bars following recommended distances for fixing to rafters. Stagger holes on alternate sides at approximately 400mm centres.
Recommended rafter spacing by sheet thickness
- 6mm multiwall: maximum 450mm between rafters
- 8mm multiwall: maximum 600mm between rafters
- 10mm multiwall: maximum 700mm between rafters
- 16mm multiwall: maximum 1050mm between rafters
- 25mm multiwall: maximum 1250mm between rafters
Step-by-Step Installation
Step 2: Installing on rafters
- Pre-drill rafters: depending on rafter width, pre-drill for glazing bars (40mm or 60mm spacing). Follow recommended distances based on sheet thickness.
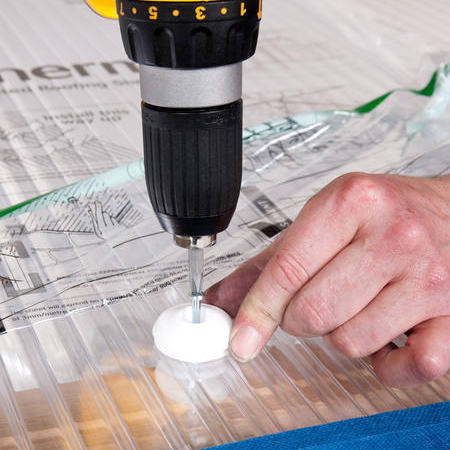
- Install fixing buttons: use fixing buttons every 400mm along intermediate rafters. Buttons come with screws suitable for wood. For steel rafters, change screws to steel equivalents.
- Allow expansion gaps: a 10mm gap must be left between sheets when joining on a rafter using a Capex bar. For H-section or snap profiles, allow 5mm each side for expansion and contraction.
Step 3: Installing on purlins
Attach the bottom half of the glazing bar to every purlin. Ensure spacing is not greater than 1,500mm. Seal all screws with waterproof silicone sealant.
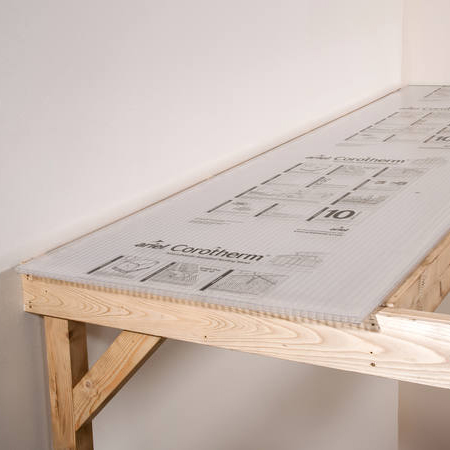
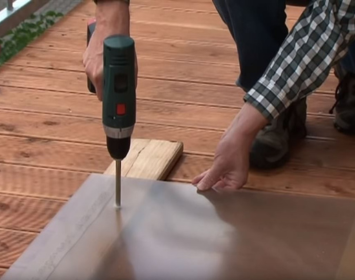
Step 4: Sheet preparation — measure and cut
- Take accurate measurements: measure the length and width of the area, allowing for overhang and trimming.
- Mark and cut: use a marker to note measurements on sheets and carefully cut using a jigsaw or circular saw.
- Apply protective tapes: peel back the protective film from edges about 50mm. Fix sealing tape at the top and perforated breather tape at the bottom. This allows air circulation within the sheet to avoid condensation. The UV side has the manufacturer’s writing on it — do not remove the protective film until installation is complete.
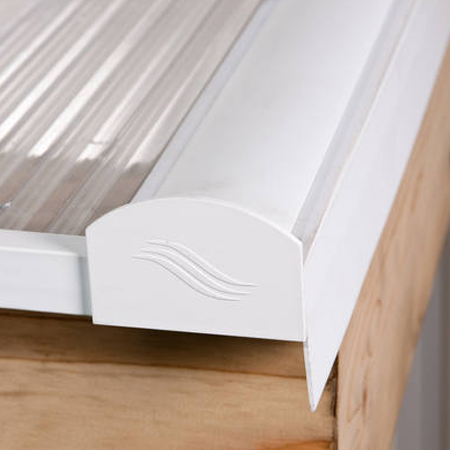
Step 5: Install the end caps and side profiles
- Apply flashing tape: begin by applying flashing tape for a watertight seal between the wall and roof.
- Cut and install: cut polycarbonate end caps and profiles to size. Slide end caps onto sheet edges and attach profiles using roofing screws.
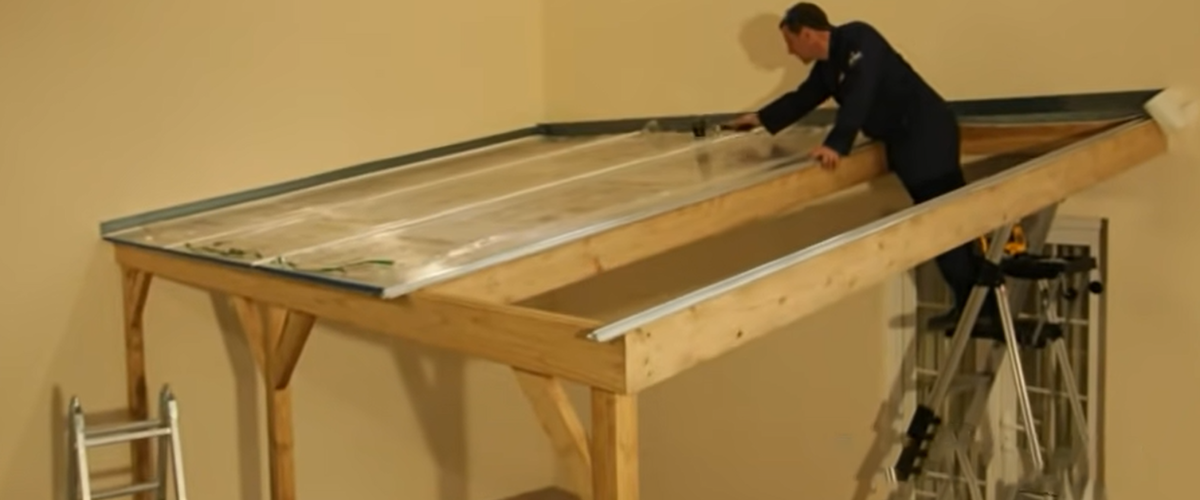
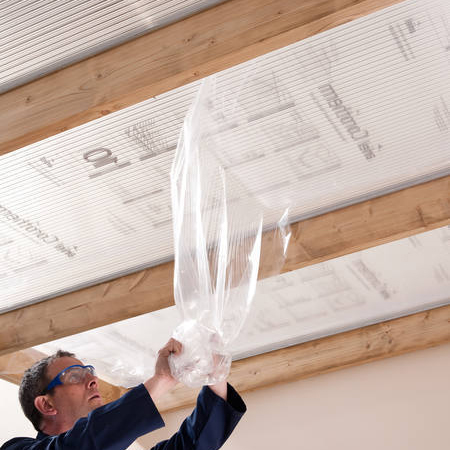
Step 6: Install the sheets
- Position the first sheet: starting at one end, position the first sheet onto the end caps and profiles.
- Attach sheets: use roofing screws and a screw gun to secure the sheet to end caps and profiles. Ensure each sheet overlaps the previous one by a few inches.
- Flute direction: the flute direction must always run with the fall/slope of the roof, not side to side. This is critical for water drainage.
Step 7: Finish the installation
- Trim edges: use a jigsaw or circular saw to trim sheet edges to the appropriate size.
- Check and tighten screws: ensure all screws are tight and secure.
- Install flashing or trim: complete the installation with any necessary flashing or trim.
Expert Tips & Best Practices
1. Accurate measurements
Measure twice, cut once. Precision in measurements saves time and materials. Use multiple measuring points for accuracy.
2. Storage and preparation
Store sheets on a flat surface indoors. Always install with the UV-protected surface (with writing) facing outward.
3. Thermal movement
Allow for thermal movement in glazing bars, closures, and fixing holes. Follow manufacturer recommendations for expansion rates.
4. Drilling and fixing
Use oversized fixing holes (18mm) to allow for sheet movement. Drill between ribs and at least 40mm from sheet edges.
5. Finishing
Cover breather tape with a U-profile sealed to the sheet top with a small silicone bead. Use low-modulus neutral silicone for all sealing.
6. Film removal
Peel back films 50mm for clean sheet insertion. Remove all films immediately after installation is complete.
7. Cleaning
Clean sheets periodically with lukewarm water and mild soap. Avoid abrasive cleaners and test new cleaners on a sample piece first.
8. Professional cut-to-size service
Consider professional cut-to-size services to eliminate on-site cutting and guarantee accuracy. 365 Plastics offers this service at no extra cost.
Frequently Asked Questions
How much gap should I leave between sheets?
Leave a 10mm gap between sheets when joining on a rafter using a Capex bar. This allows for thermal expansion and contraction. If using H-section or snap profiles, allow 5mm on each side.
Which direction should flutes run?
Flutes must always run vertically with the slope of the roof (top to bottom), never side to side. This ensures proper water drainage and prevents moisture buildup.
What rafter spacing should I use?
Spacing depends on thickness: 6mm max 450mm, 8mm max 600mm, 10mm max 700mm, 16mm max 1050mm, 25mm max 1250mm. Proper spacing ensures adequate support and weathertightness.
Which side has UV protection?
The UV-protected side has the manufacturer’s writing or labelling on it. This side must always face outward toward the sun. Keep the protective film on until after installation is complete.
What is the minimum roof slope?
The minimum roof slope should be 5 degrees to ensure proper water drainage and prevent pooling that could damage the structure.
What type of silicone should I use?
Use low-modulus neutral cure silicone sealant only. Other types (acrylic or non-neutral) will attack the polycarbonate and cause crazing and failure.
How long will installation take?
For a typical pergola or lean-to, plan on 1–2 days depending on size and complexity. Proper preparation and accurate measurements reduce installation time significantly.
Do I need to hire a professional?
This is a DIY-friendly project if you are comfortable with basic tools. Professional installation is recommended for complex roofs or if you want a guarantee on the finished result.
Pre-Installation Checklist
Pre-installation
- UV protection side confirmed (facing outward)
- Roof slope minimum 5° verified
- Glazing bars fully supported by rafters
- Correct sealant purchased (low-modulus neutral)
- All materials inspected for damage
- Weather forecast checked (avoid rain during installation)
Sheet orientation
- Flutes running vertically (top to bottom)
- No top-to-bottom joining of sheets
- 10mm gaps allowed for expansion
- Protective film peeled back 50mm only
- Sealing tape on top, breather tape on bottom
- End caps and profiles ready to install
Glazing bars
- Seals lubricated and installed
- Pre-drilled at 400mm centres
- Continuous sections (no joining)
- F-section sealed with silicone
- All fixing holes oversized (18mm)
- Rafter spacing verified per thickness
Final steps
- All screws tight and secure
- Silicone sealant applied to all joints
- All protective films removed
- Flashing installed where roof meets house
- Final inspection completed
- Gutters and drainage verified
Need Help Planning Your Installation?
Our roofing experts are ready to help with measurements, quotes, and technical advice.
Get an Instant Quote for Your Roof
You can now create your own package with our instant multiwall polycarbonate roof calculator. Just select your roof type, enter your roof dimensions, and you will receive an instant quote for all the sheets and accessories you need to start your roofing project.
If you need any help, contact us on 01 8010022 or [email protected] and we will be happy to assist.
Related Installation Guides
How to Cut Polycarbonate Sheets
Tools, techniques and safety tips for cutting multiwall sheets cleanly without cracking or chipping.
Read guide →Polycarbonate vs Perspex vs Plexiglass
Complete comparison guide covering impact resistance, cost analysis, durability and best uses.
Read guide →Why Choose Multiwall Polycarbonate
The benefits of multiwall polycarbonate sheets and why it is the best option for roofing projects.
Read guide →Conclusion
By following this step-by-step guide and incorporating the expert tips above, you are well-equipped to tackle the installation of multiwall polycarbonate roofing sheets. With careful planning, accurate measurements, and attention to detail, you will create a durable and weathertight roofing solution that performs for 15–20 years.
If you have any questions or need assistance, the team at 365 Plastics is just a call or email away on 01 8010022 or [email protected].