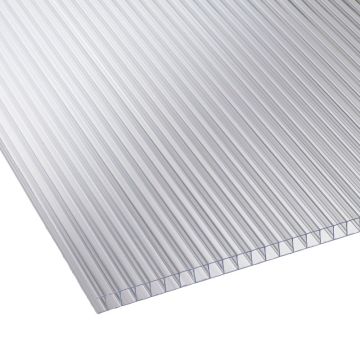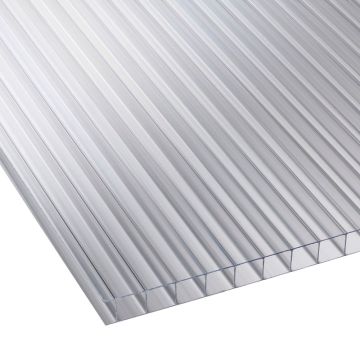


How to Cut Multiwall Polycarbonate Sheets: Complete DIY Guide
Cutting multiwall polycarbonate sheets might seem intimidating, but with the right tools and techniques, you can achieve professional-quality cuts every time. Whether you're building a greenhouse, pergola roof, or protective structure, this comprehensive guide walks you through every step to ensure success.
Learn the best cutting methods for different thicknesses, avoid common mistakes, and finish your edges like a pro.
Quick Summary: Cutting Multiwall Polycarbonate Sheets
Essential Steps:
- Thin sheets (under 6mm): Utility knife scoring method produces the cleanest results
- Thick sheets (6mm+): Circular saw, jigsaw, or bandsaw with fine-tooth blade
- Always measure twice and mark clearly on protective film
- Secure sheet with clamps 12 inches apart on both sides of cut line
- Use steady, moderate pressure — let the blade do the work
- Sand edges smooth with 220-grit sandpaper after cutting
⏱️ Project Time: 15-30 minutes per sheet | Difficulty: Beginner-Intermediate | Cost: €15-40 in tools
Table of Contents
⚠️ Critical Cutting Mistakes That Damage Sheets
These errors can reduce your sheet's lifespan and create unusable pieces:
- Using dull blades: Creates chipping, stress fractures, and rough edges
- Cutting too fast: Causes melting, heat damage, and material degradation
- No sheet support: Overhang creates vibration, cracking, and uneven cuts
- Single measurement: Wrong dimensions waste expensive material
- Ignoring protective film: Exposes surface to scratches and contamination during cutting
Why Proper Cutting Matters
Poor cutting techniques compromise your entire project. Cracked or chipped edges weaken structural integrity, uneven cuts prevent proper fitting, and rough surfaces collect dirt and moisture.
Benefits of Correct Technique
- Clean edges fit properly in frames and profiles
- No stress fractures that weaken the material
- Professional appearance for your finished project
- Longer lifespan by preventing water infiltration
- Proper sealing prevents condensation and algae growth
- No material waste from failed cuts
Consequences of Poor Cutting
- Chipped edges let water seep into flutes
- Stress cracks spread over time, causing failure
- Uneven cuts won't fit frames or profiles
- Rough surfaces trap dirt and moisture
- Heat damage from fast cutting clouds the material
- Expensive sheets become unusable scraps
Tools & Materials Needed
You probably have most of these tools already. The key is having the right blade and proper support.
Cutting Tools (Choose One)
- Utility Knife — For thin sheets (under 6mm), produces cleanest edges
- Circular Saw — Fastest for straight cuts, requires fine-tooth blade
- Jigsaw — Best for curved cuts and intricate shapes
- Bandsaw — Excellent for smooth, straight cuts with minimal vibration
- Table Saw — Most precise for production runs
- Blade Requirement: 60+ teeth for fine finishes (80+ for best results)
Support & Measuring Tools
- Clamps (4+) — 12-inch spacing along cutting line
- Metal Straightedge (36+ inches) — For marking and guiding blade
- Measuring Tape (25+ feet) — Double-check all measurements
- Marker or Pencil — Non-permanent marking on protective film
- Fine-Grit Sandpaper — 220-grit minimum for edge finishing
- Protective Film Peeler (optional) — Removes film cleanly after cutting
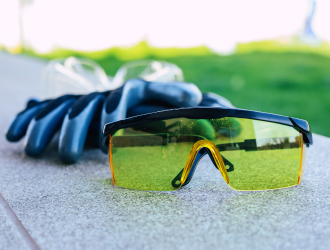
Safety Equipment (Essential)
- Safety Glasses — Protects eyes from flying particles
- Work Gloves — Prevents cuts from sharp edges
- Dust Mask or Respirator — Protects lungs from plastic particles
- Hearing Protection — Required when using power tools
- Work Shoes — Closed-toe, non-slip sole
Essential Cutting Tools

Choosing Your Cutting Method by Sheet Thickness
For Thin Sheets (Under 6mm)
Best Method: Utility Knife Scoring
- Produces cleanest, chip-free edges
- Professional finish without power tools
- Minimal dust and noise
- Time: 5-10 minutes per cut
- Cost: Minimal (utility knife only)
- Ideal for display cases, windows, custom panels
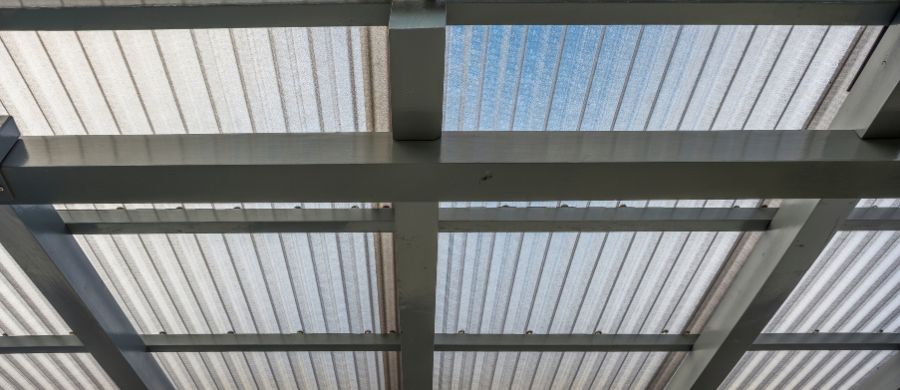
For Thick Sheets (6mm+)
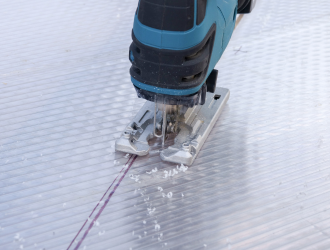
Best Method: Circular Saw or Jigsaw
- Circular saw: Fastest for straight cuts
- Jigsaw: Best for curves and shapes
- Bandsaw: Cleanest cuts with less vibration
- Time: 3-8 minutes per cut
- Requires fine-tooth blade (60+ teeth)
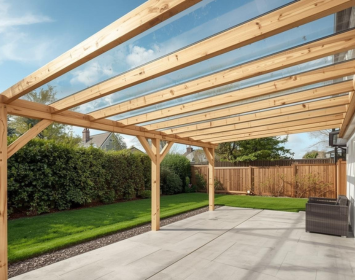
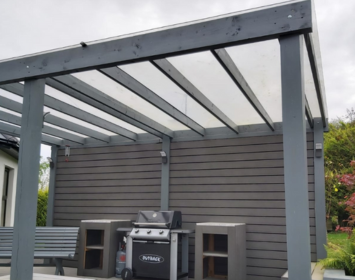
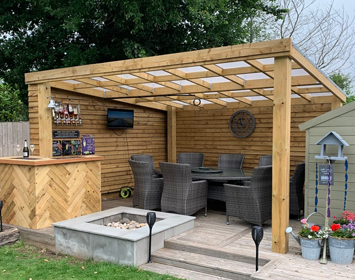
- Ideal for pergola roofs, greenhouses, structural panels
Step-by-Step Cutting Instructions
Step 1: Prepare Your Workspace
- Clean the sheet: Remove all dirt, dust, and debris with a soft cloth
- Choose flat surface: Work surface must support the entire sheet without overhang
- Ensure good lighting: See your cutting line clearly throughout the process
- Clear obstructions: Remove clutter that might interfere with safe cutting
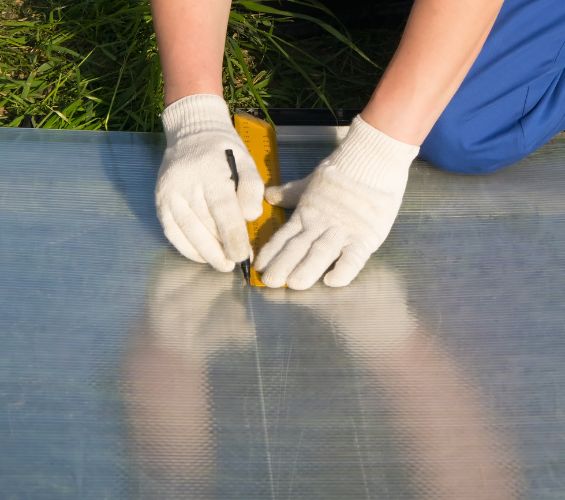
Step 2: Measure and Mark
- Measure twice: Check dimensions at multiple points to verify accuracy
- Mark on protective film: Use marker or pencil (non-permanent)
- Use metal straightedge: Draw perfectly straight line for precise cuts
- Double-check before cutting: Measure from mark to edges one more time
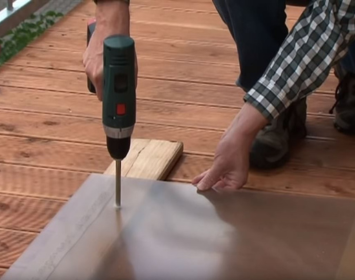
Step 3: Secure the Sheet
- Position clamps: Place 12 inches apart along the cutting line
- Clamp both sides: Support above and below the cut line
- Verify stability: Push down firmly — sheet should not move at all
- Check for gaps: Sheet must be flat against work surface
Step 4: Choose Your Cutting Method
Method A: Utility Knife (Thin Sheets Under 6mm)
- Align utility knife with your marked cutting line
- Use metal straightedge as guide for blade
- Score the line with moderate pressure (3-4 passes)
- Deepen groove with each pass — don't cut through in one stroke
- Position sheet over table edge with score line aligned
- Apply downward pressure on both sides — sheet should snap cleanly
- Sand edges with 220-grit sandpaper
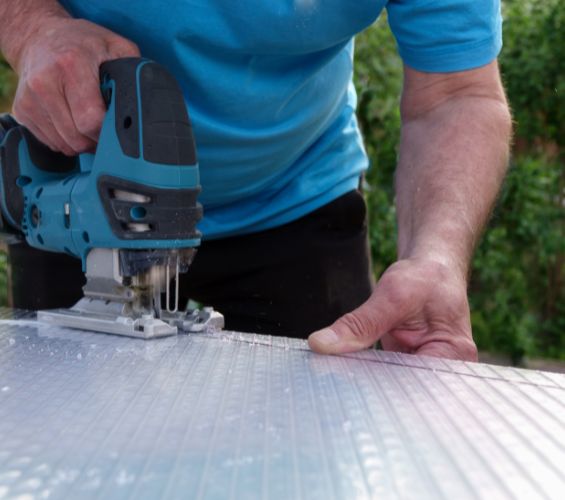
Method B: Circular Saw (Thick Sheets 6mm+)
- Install fine-tooth blade (80+ teeth recommended)
- Align blade with your marked cutting line
- Start saw and bring to full speed (wait 3-5 seconds)
- Guide blade steadily along cutting line
- Use moderate, consistent pressure — never force the blade
- Support off-cut piece as you reach the end to prevent dropping
- Sand edges and remove protective film
Method C: Jigsaw (Curved Cuts)
- Install fine-tooth jigsaw blade
- Mark your curved pattern clearly on protective film
- Secure sheet firmly with clamps to prevent movement
- Use slow to moderate blade speed
- Feed sheet smoothly without forcing blade
- Make relief cuts from edges if attempting sharp corners
- Sand and finish edges carefully
Step 5: Finish the Edges
- Sand immediately: Use 220-grit sandpaper with gentle, even strokes
- Check for burrs: Run finger carefully along edge to find rough spots
- Continue sanding: If burrs present, sand again until smooth
- Wipe with damp cloth: Remove dust particles before inspection
- Remove protective film: Peel carefully after all cutting is complete
Common Mistakes to Avoid
❌ Using Wrong Tools
Standard saws create jagged edges and stress fractures. Use fine-tooth blades (60+ teeth) designed for plastic cutting to achieve clean results.
❌ Cutting Too Fast
Friction from speed causes melting, overheating, and material damage. Cut slowly with steady pressure. Let the blade do the work.
❌ Inadequate Sheet Support
Overhang causes vibration and cracking. Ensure sheet is properly clamped with support on both sides of cutting line.
❌ Measuring Only Once
Inaccurate measurements waste expensive material. Always measure at multiple points and double-check before cutting.
❌ Removing Protective Film Early
Film shields the surface from scratches and dust during cutting. Remove only after cutting and sanding is completely finished.
Safety Tips & Precautions
Before You Start
- Inspect all tools for damage or wear
- Replace dull blades immediately
- Check clamps work properly
- Ensure work area is clear of hazards
- Put on all safety equipment before starting
- Tell others you're beginning the cutting process
During Cutting
- Keep hands clear of blade path
- Never reach across moving blade
- Maintain firm footing and balance
- Focus entirely on the task
- Stop immediately if sheet moves or blade binds
- Never force the cutting tool
Personal Protective Equipment
- Safety Glasses: Prevents eye damage from particles
- Gloves: Protects hands from sharp edges
- Dust Mask: Prevents inhalation of plastic particles
- Hearing Protection: Required for power tools (80+ dB)
- Proper Clothing: Closed-toe shoes, no loose fabric
- Long Hair: Tie back securely away from tools
After Cutting
- Let blade come to complete stop before removing sheet
- Inspect all edges for burrs or sharp points
- Sand any rough areas before handling
- Clean up dust and plastic particles
- Store tools safely out of reach
- Dispose of scrap pieces properly
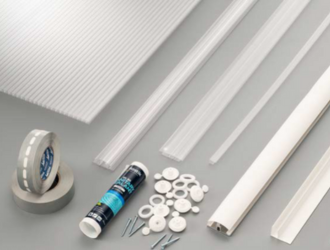
Cutting Tools & Accessories

Professional Cutting Service Available
Not comfortable cutting yourself? 365 Plastics offers professional pre-cutting services with state-of-the-art technology and precision guarantee.
Our Cutting Service Includes:
- Free square & rectangle cuts to your exact specifications
- Precision PolyMaster cutting technology for perfect results
- Custom shape fabrication available (contact for quote)
- Bulk order discounts for large projects
- Professional edge finishing included
Contact for Custom Quotes:
Frequently Asked Questions
What tools do I need to cut multiwall polycarbonate sheets?
For thin sheets (under 6mm), use a utility knife. For thick sheets (6mm+), use a circular saw, jigsaw, or bandsaw with a fine-tooth blade (60+ teeth). You'll also need clamps, measuring tape, metal straightedge, and 220-grit sandpaper.
How do I ensure a straight cut?
Use a metal straightedge to mark your cutting line. Clamp the sheet firmly with supports on both sides of the line. Use the straightedge as a guide for your cutting tool throughout the process.
Can I use a jigsaw to cut polycarbonate?
Yes. Use a fine-tooth jigsaw blade and cut at slow to moderate speed. Jigsaws are ideal for curved cuts and intricate shapes. Straight cuts are better achieved with circular saws.
What's the best way to cut thick sheets?
A circular saw with a fine-tooth blade (80+ teeth) is the fastest and cleanest method. Ensure the blade is sharp, support the sheet properly, and cut slowly with steady pressure to avoid cracking.
How do I avoid chipping or cracking?
Use sharp blades (replace frequently), cut at slow to moderate speed, support the sheet on both sides close to the cut line, and never force the blade. Proper clamping prevents vibration.
Do I need to remove the protective film?
Leave the protective film on during cutting to prevent scratches and dust settling on the surface. Remove it only after you've finished cutting and sanding the edges.
How do I finish edges after cutting?
Sand with 220-grit sandpaper using gentle, even strokes. Run your finger along the edge to check for burrs. Wipe with a damp cloth to remove dust. For professional finish, use higher-grit sandpaper.
Is it safe to cut polycarbonate indoors?
Cutting produces small plastic particles and dust. Work in a well-ventilated area or outdoors when possible. Always wear safety glasses and a dust mask to protect yourself from inhalation.
Ready to Start Your Project?
Need multiwall polycarbonate sheets for your project? Browse our complete selection or get expert advice.
Related Installation & Care Guides
Installing Multiwall Roofing Sheets
Complete step-by-step installation guide with measurements, glazing bars, and best practices for pergolas and greenhouses.
Read Guide →Cleaning Polycarbonate Sheets
Maintenance guide with safe cleaning methods, problem area solutions, and maintenance schedule to keep sheets crystal clear.
Read Guide →Polycarbonate vs Perspex vs Plexiglass
Material comparison guide with durability, clarity, cost analysis, and best applications for each plastic sheet type.
Read Guide →Cutting Acrylic & Plexiglas Sheets
Step-by-step guide for cutting acrylic sheets with tools, techniques, and best practices for clean, chip-free cuts.
Read Guide →Why Choose Multiwall Polycarbonate
Benefits guide comparing multiwall polycarbonate advantages including durability, insulation, and long-term cost savings.
Read Guide →Secondary Glazing Installation
Complete guide to installing secondary glazing windows with acrylic or polycarbonate sheets for energy efficiency.
Read Guide →Master the Art of Cutting Polycarbonate
With the right tools, proper technique, and careful attention to detail, cutting multiwall polycarbonate sheets is achievable for any DIYer. Whether you choose the utility knife scoring method for precision or a power saw for speed, these techniques deliver professional results.
Remember: patience and proper preparation are more important than speed. Take time to measure accurately, secure your sheet properly, and use sharp blades. Your finished project will reflect the care you took during the cutting process.
If you'd rather have professionals handle the cutting, 365 Plastics offers precision pre-cutting services with state-of-the-art technology. Contact us at 01 8010022 or [email protected] for a quote today.